What's in the Box - Grillo One
This page describes all components included with your Grillo One sensor.
Package contents
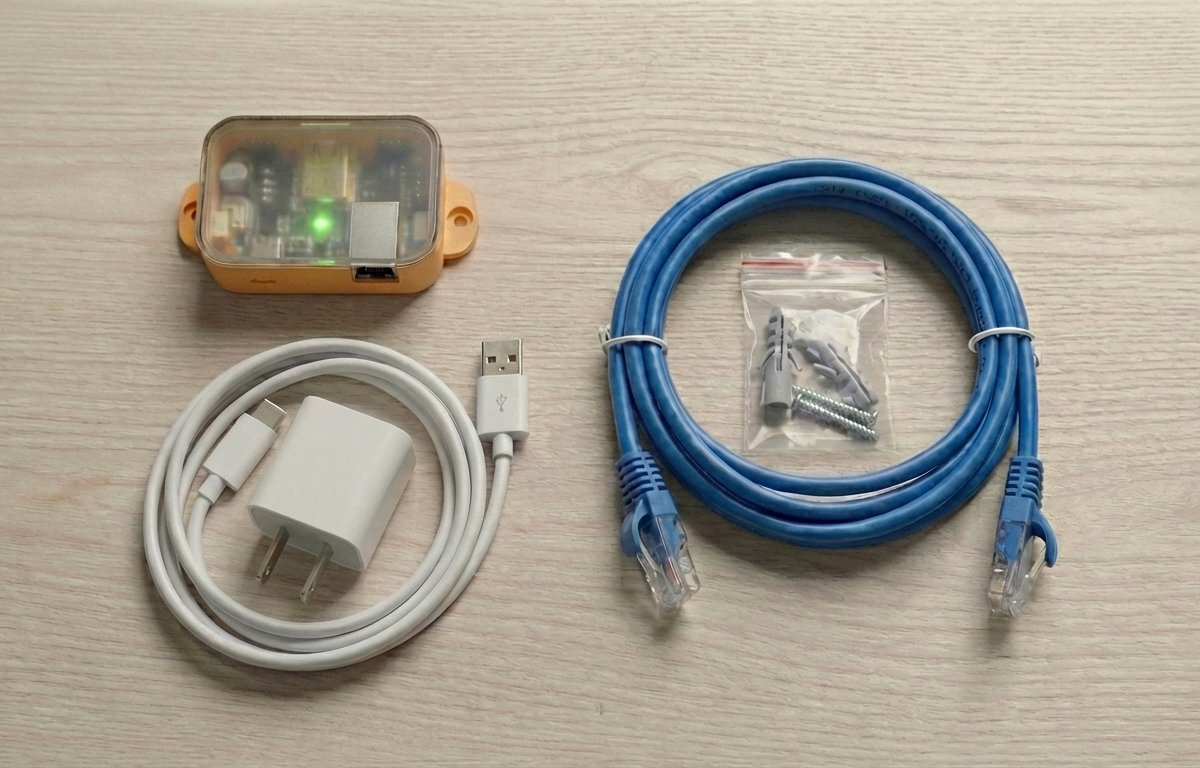
1. Grillo One sensor unit
The main sensor device containing:
- High-precision 3-axis MEMS accelerometer (seismic-grade, ±2g range)
- Dual-core microcontroller
- WiFi and Ethernet connectivity
- 3 RGB LED status indicators
- USB port (for power and firmware updates)
2. Power adapter
- Input: 100-240V AC
- Output: 5V DC
- For continuous power supply
3. Ethernet cable
- Standard Cat5e/Cat6 cable
- RJ45 connectors
- For wired network connection (recommended for maximum reliability)
4. Quick start guide
Printed card with basic setup instructions and QR code for online documentation.
5. Mounting hardware
- Mounting screws
- Wall plugs
Sensor unit details
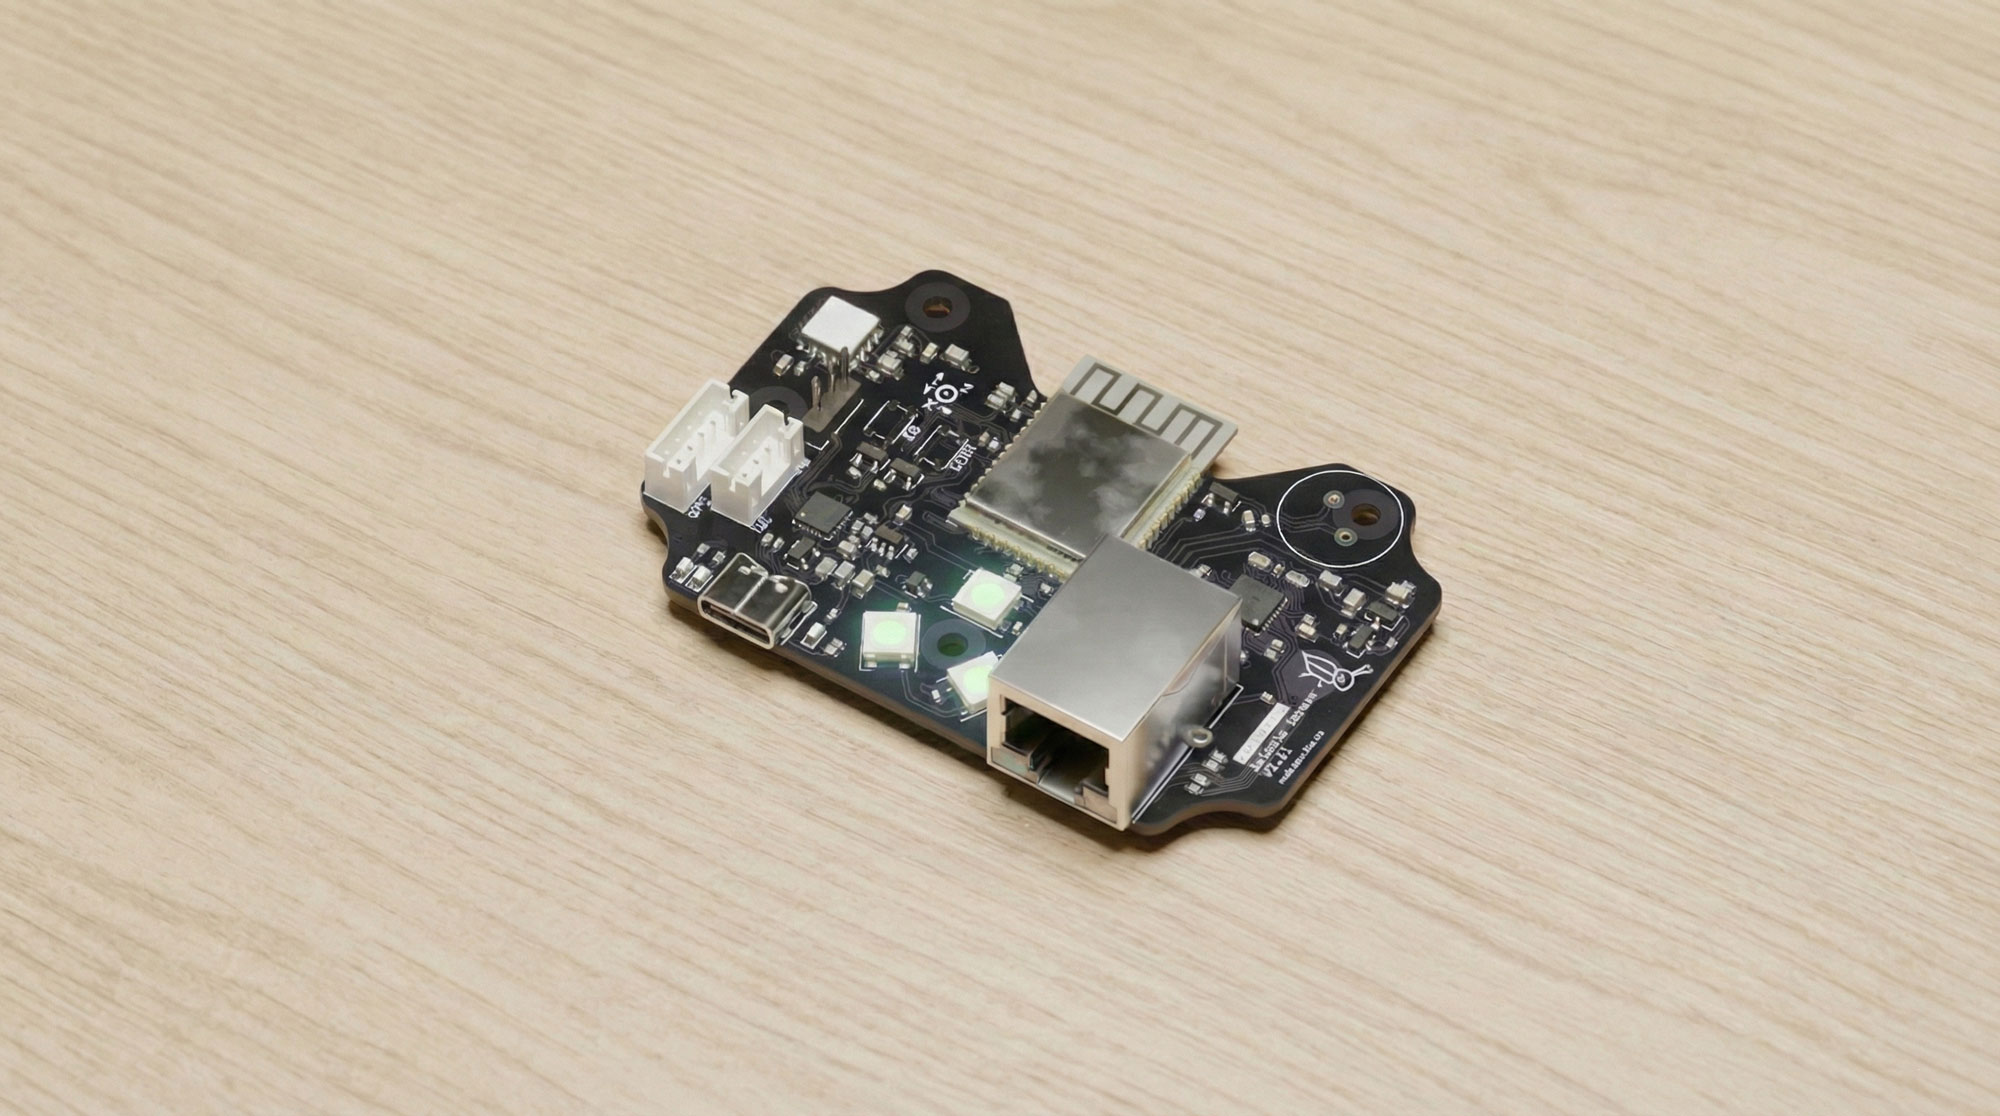
Status LEDs
The Grillo One has three RGB status LEDs:
| LED | Purpose |
|---|---|
| Network LED | Shows connection status (Ethernet/WiFi) |
| Sensor LED | Shows accelerometer status |
| Data LED | Flashes when transmitting data |
Ports and connectors
- Ethernet port - RJ45 connector for wired network connection
- USB port - For power input and firmware updates
- DC power input - For AC adapter connection
Bottom
- Mounting holes — for screw attachment
- Device ID sticker — required for provisioning (see below)
Verify your package
Before beginning setup, verify all components are present and undamaged:
- Sensor unit is intact with no visible damage
- Device ID sticker is present (on device or packaging)
- Power adapter and cable are present
- Ethernet cable is included
- Quick start guide is present
- Mounting hardware is complete
Missing or damaged items?
If any components are missing or damaged, contact Grillo support before proceeding with installation.
Device ID sticker
Each sensor has a Device ID sticker — you'll need this to claim and provision the sensor in Grillo Cloud.
The sticker can be found:
- On the packaging — label on the outer box
- On the device — bottom of the sensor unit
The sticker contains:
- Device ID — unique identifier required for provisioning
- QR code — for quick scanning during setup
tip
Take a photo of the Device ID sticker before installation. You'll need it when adding the sensor to your Grillo Cloud dashboard.
Next steps
Once you've verified all components: