Configuring Sensors
Learn how to configure sensor settings remotely from the Grillo Cloud dashboard.
Accessing configuration
- Navigate to the sensor detail pane
- Click the "Configuration" tab or "Edit" button
- The configuration form will open
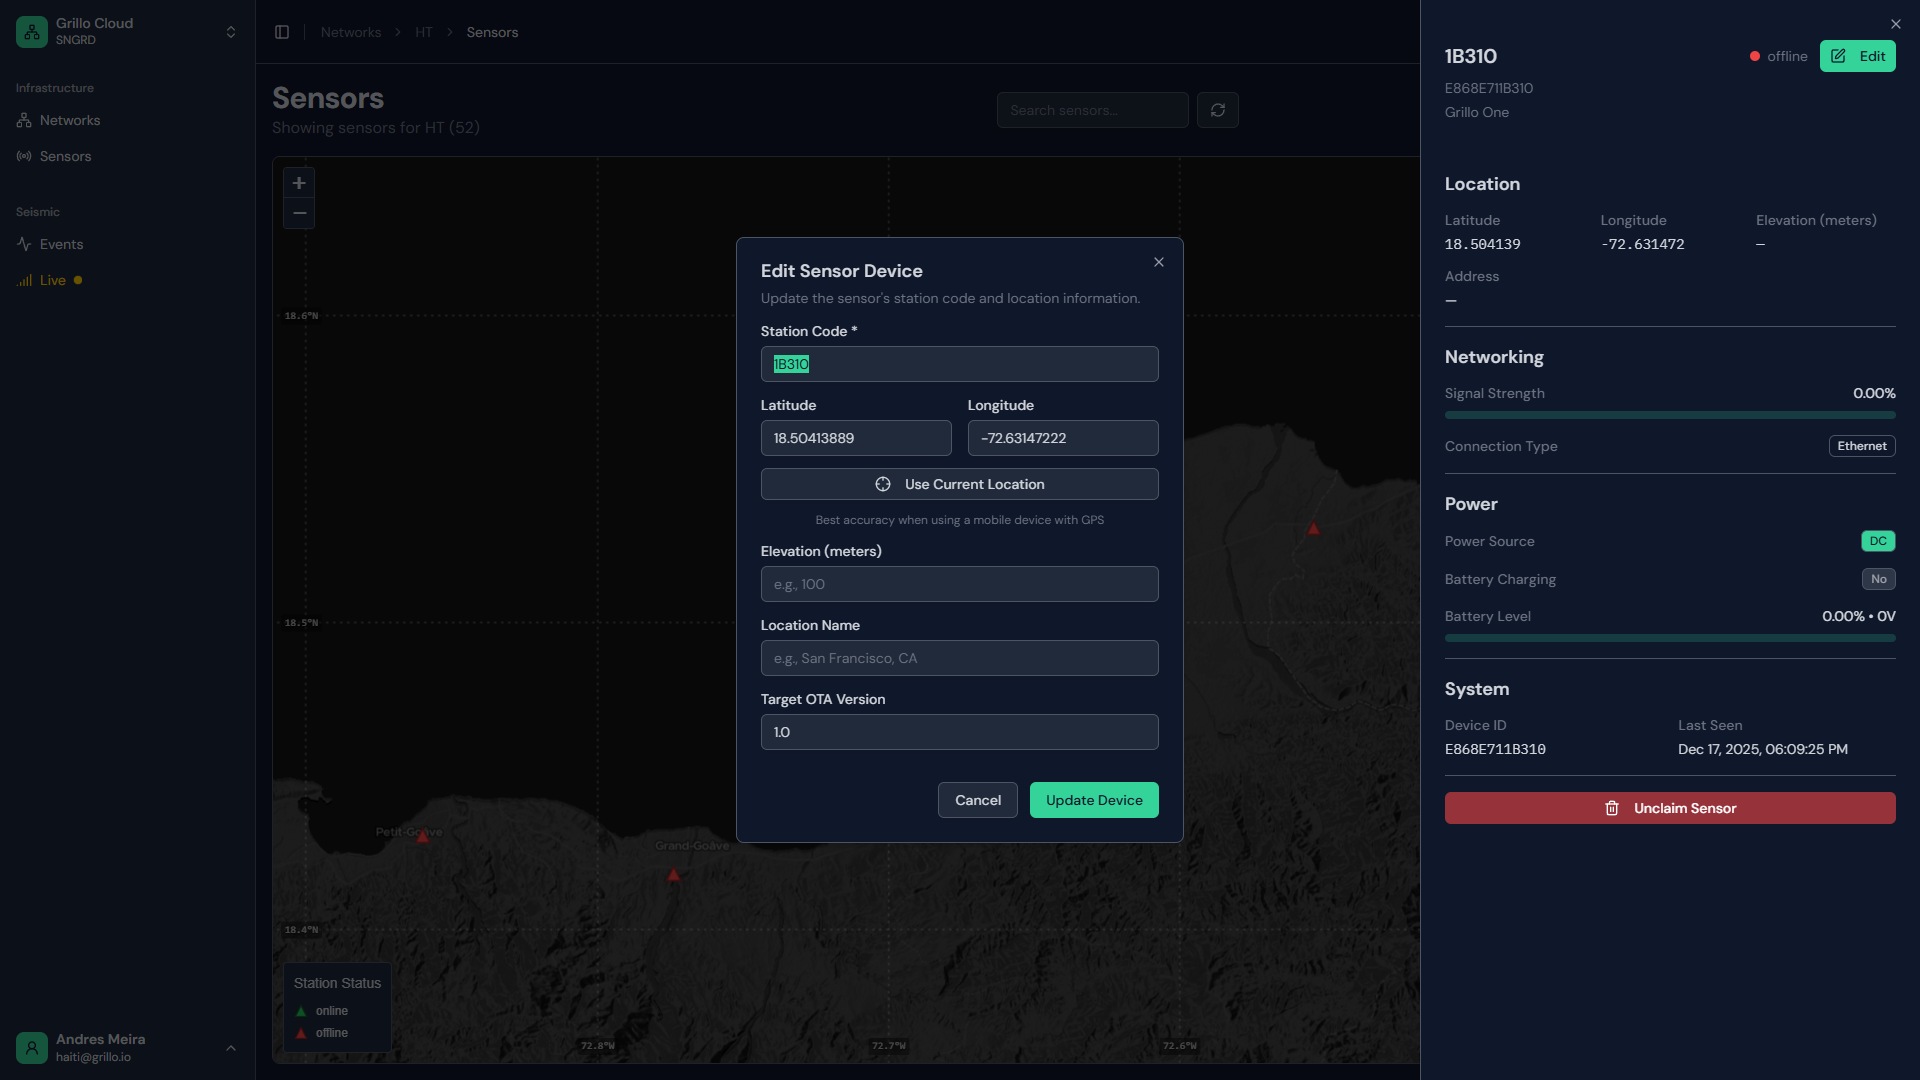
Configuration categories
Station identification
Configure how the sensor is identified in the seismic data community:
| Field | Description | Example |
|---|---|---|
| Station code | FDSN station identifier | "GRIL01" |
| Network code | Network identifier | "GR" |
| Location code | Location modifier | "00" |
Detailed station naming guide →
Location information
Set the sensor's geographic position:
| Field | Description |
|---|---|
| Latitude | Decimal degrees (-90 to 90) |
| Longitude | Decimal degrees (-180 to 180) |
| Elevation | Meters above sea level |
| Site name | Location description |
Display settings
Configure how the sensor appears in the dashboard:
| Field | Description |
|---|---|
| Display name | Friendly name for the sensor |
| Description | Notes about the installation |
| Tags | Labels for organization |
Data server
Configure where the sensor sends its seismic waveform data. This is the key setting for hybrid deployments.
| Setting | Description | Default |
|---|---|---|
| Data server URI | CoAP endpoint for seismic data | coap://ingest.grillo.io:5684 |
Full Cloud mode (default): Leave this as the default (coap://ingest.grillo.io:5684). Seismic data goes to Grillo Cloud for detection and processing.
Hybrid mode: Set this to your own server running coap2seis:
coap://<your-server-ip>:5684
After saving, the new data server address is pushed to the sensor via the SOH response channel. The sensor begins sending seismic data to the new endpoint on its next connection cycle. SOH messages continue going to Grillo Cloud regardless of this setting.
Changing the data server only affects seismic waveform data. Device monitoring via SOH always goes to Grillo Cloud.
Data settings
Configure data collection parameters:
| Setting | Options |
|---|---|
| Sample rate | Standard, High, Low |
| Data format | Native, miniSEED |
| Compression | Enabled, Disabled |
Making changes
Edit process
- Open the configuration form
- Make your changes
- Review the changes
- Click "Save"
Configuration sync
After saving:
- Changes are stored in Grillo Cloud
- Configuration is sent to the sensor
- Sensor acknowledges receipt
- Status updates to show new config
Configuration sync requires the sensor to be online. Changes will be applied when offline sensors reconnect.
Pending changes
If the sensor is offline:
- Changes are queued
- Status shows "Pending configuration"
- Applied when sensor reconnects
Bulk configuration
Updating multiple sensors
To apply the same configuration to multiple sensors:
- Select sensors in table view
- Click "Bulk edit"
- Choose fields to update
- Enter new values
- Apply to selected sensors
Configuration templates
Save common configurations as templates:
- Configure a sensor as desired
- Click "Save as template"
- Apply template to other sensors
Advanced settings
Network communication
Settings affecting how the sensor communicates:
| Setting | Description |
|---|---|
| Heartbeat interval | Status update frequency |
| Data upload interval | How often data is sent |
| Retry behavior | How connection failures are handled |
Firmware updates
Manage sensor firmware:
- Check current firmware version
- View available updates
- Schedule or apply updates
Firmware updates may cause brief disconnection. Plan accordingly.
Factory reset
Reset sensor to default configuration:
- Navigate to Advanced settings
- Click "Factory reset"
- Confirm the action
- Sensor will reset and need reconfiguration
Configuration validation
Required fields
Some fields are required:
- Station code (for FDSN compliance)
- Location coordinates (for map display)
Format validation
Fields are validated for correct format:
- Coordinates must be valid ranges
- Station codes follow FDSN rules
- Names have character limits
Error messages
If configuration fails:
- Error message explains the issue
- Invalid fields are highlighted
- Correct errors and retry
Configuration history
Viewing history
See past configuration changes:
- Open sensor details
- Navigate to History tab
- View configuration changelog
Reverting changes
To undo a configuration change:
- Find the previous configuration in history
- Click "Restore"
- Confirm the revert
Best practices
Before configuring
- Ensure sensor is online for immediate sync
- Document current settings before changing
- Test changes on one sensor before bulk apply
Naming conventions
- Use consistent station code formats
- Include meaningful location information
- Document any non-standard configurations
Change management
- Log significant configuration changes
- Coordinate changes with your team
- Monitor sensors after changes
Troubleshooting
Changes not applying
- Verify sensor is online
- Check pending configuration status
- Refresh the page
- Try saving again
Validation errors
- Check error messages
- Verify field formats
- Ensure required fields are filled
- Review FDSN conventions
Sensor not responding
- Check sensor status
- Verify network connectivity
- Try restarting the sensor
- Contact support if issues persist